
RV slide-out stuck or won't move: troubleshooting and manual retraction
Most stuck slides are caused by low battery voltage, a tripped fuse or breaker, an obstruction or a mechanical bind. Find out which kind of slide system you have, rule out power, and know how to bring it in manually so you can still drive home.
Recommended tools & parts for this job
Electrical & testing
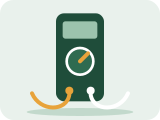
Digital multimeter (auto-ranging, with DC amps)
The single most useful RV diagnostic tool: checks battery voltage, fuses, switches, continuity and 120V outlets.
Check price on Amazon.ca
Cleaning & care
Dry slide-out lubricant spray
Lubricates slide mechanisms without collecting grit.
Check price on Amazon.ca
Cleaning & care
Rubber seal conditioner
Keeps slide and door seals supple, especially in dry Alberta air.
Check price on Amazon.ca
Leveling & stabilizing
Cordless drill with stabilizer jack socket adapter
Saves your wrists when raising and lowering stabilizers.
Check price on Amazon.ca
Electrical & testing
Automotive blade fuse assortment
Keep spares of every size your RV uses.
Check price on Amazon.ca
Essential tool kit
LED headlamp
Hands-free light for basements, compartments and under the RV.
Check price on Amazon.caAs an Amazon Associate I earn from qualifying purchases. Always confirm part numbers and sizes against your RV or appliance model before ordering. See all recommended RV tools & parts →
Know your slide system
Before troubleshooting, find out which mechanism your RV uses. It's usually in the owner's manual or on a label near the slide motor or control.
- Electric rack-and-pinion (through-frame): A motor under the slide drives gear racks. Common on larger slides.
- In-wall (e.g. Schwintek-style) systems: Motors in the wall on each side of the slide drive gear tracks. Popular in trailers and fifth wheels.
- Cable systems: Cables and pulleys pull the slide in and out.
- Hydraulic: Hydraulic cylinders, often sharing a pump with leveling jacks. Common on motorhomes and larger fifth wheels.
Each has a different manual override method, so check your specific manual. If you've lost it, the slide manufacturer's name is usually on the motor or controller, and most publish manuals online.
Safety: Slides are heavy and powerful. Keep people and pets clear inside and out while one is moving. Never put hands near gears, racks or the slide's moving edges. Disconnect power before working on the mechanism. Don't override the system to force a slide that is binding. You can bend frames and tear seals.
Step 1: Rule out the simple stuff
- Is the RV level and stable? Many manufacturers specify that the RV should be level (and on some, that stabilizers are deployed) before moving slides. Twisting the frame on uneven ground can bind a slide.
- Is there an interlock? Some RVs require the engine running, parking brake set, or transmission in Park before slides operate.
- Obstructions: Check inside and outside. Cabinet doors, a shoe, a cooler, a fallen cushion, a tree branch or a picnic table can stop a slide. On in-wall systems, the controller may stop if it senses an obstruction.
- Snow and ice: In Calgary winters, snow on a slide topper (awning) or ice in the seals can stop a slide or tear the seals. Clear the slide roof before retracting and never force a frozen slide.
Step 2: Check battery voltage
Slide motors draw a lot of current, and low voltage is the number-one cause of a slow or stopped slide. Even when plugged in, many converters can't supply enough current on their own. Slides rely on the battery.
- Measure battery voltage with a Digital multimeter (auto-ranging, with DC amps) at rest, then while someone operates the slide.
- If the voltage drops sharply (well below 12V) during operation, the battery is weak or discharged, or connections are poor.
- Charge the battery fully, or connect a running tow vehicle, and try again.
For in-wall systems, low voltage often causes one side to move and the other to stall, so the slide goes in crooked. Fix the voltage first.
Step 3: Fuses, breakers and the switch
- Check the slide fuse or auto-reset breaker, often near the battery or in the 12V panel. Auto-reset breakers can trip repeatedly when the motor strains.
- Listen at the motor while someone presses the switch. A click with no motor suggests a relay or controller problem or a stalled motor. Silence suggests no power reaching it.
- Test for voltage at the switch and at the motor connector. If voltage reaches the motor connector but the motor doesn't run, the motor may be faulty.
- In-wall systems have a controller that may show error codes through LED blink patterns. Look these up in the manual.
Step 4: Look for a mechanical bind
If power is fine but the slide strains, moves unevenly or makes grinding noises:
- Inspect the gear racks or tracks for debris, broken teeth or a missing bolt.
- Look at the slide's floor for a damaged roller or a bulge in the flooring.
- Check whether the slide's seals are catching or rolled over.
- On cable systems, look for a slack or frayed cable.
- On hydraulic systems, check fluid level and look for leaks at lines and cylinders.
Lubricate only as the slide manufacturer recommends. Many specify a dry lubricant such as dry slide-out lubricant, because grease attracts grit. Some in-wall systems specifically say not to lubricate the gear tracks. Check first.
Step 5: Bring it in manually
If you can't fix it on the spot, most slides have a manual override so you can retract and travel:
- Rack-and-pinion: Usually a brake release on the motor, then a hand crank or drill (with an adapter) on the motor shaft. Release the brake only as instructed, since the slide may move on a slope.
- In-wall systems: Often you disconnect the motors (or turn a release) and push the slide in by hand, or use a drill on the motor shaft. Some have manual override modes on the controller.
- Hydraulic: Usually a manual pump or a valve-release procedure.
A cordless drill with the right adapter makes manual retraction far easier, but go slowly and stop at the first sign of binding. Once in, secure the slide for travel if the manual says to (some need a travel lock or strap).
Slide moves crooked or out of sync
On in-wall systems, one end leading the other usually means low voltage, a failing motor on one side, or a controller that needs resynchronizing. Most have a documented resync procedure. Don't keep operating a racked slide, as you risk damage.
Leaks and drafts around slides
Worn or flattened slide seals let in water, dust and cold air, which you'll notice fast during a Calgary cold snap. Clean the seals, use a rubber seal conditioner and check that wiper seals lie flat when the slide is in. Replace torn seals.
Prevent slide problems
- Keep the battery healthy.
- Retract slides before storm winds, heavy snow or hail if you can. Slide toppers and tops take a beating.
- Clean and inspect seals and mechanism each spring.
- In storage, keep slides in unless the manufacturer says otherwise. It protects seals and keeps snow off.
When to call a pro
Bent racks or frames, broken gear teeth, hydraulic leaks, water damage in the slide floor, failed motors inside walls you can't access, or any slide that drops or tilts. Slide repairs often need two or three people and special supports.
How-to videos


Videos are made by third-party creators and load from youtube-nocookie.com only when you press play. Models differ, so always follow your own manuals and the safety notes on this page.
Disclaimer: This guide is general information based on common RV designs. Models differ, so check your owner's manual and appliance manuals. Propane, 120V electrical and brake systems can cause serious injury if handled incorrectly. If you are unsure, stop and book a certified RV technician.